|
Using multiple e-mail addresses without using identities
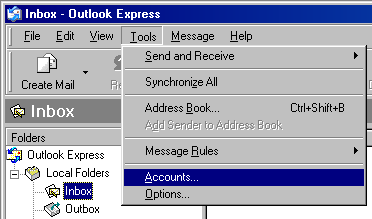
Click on Tools / Accounts...
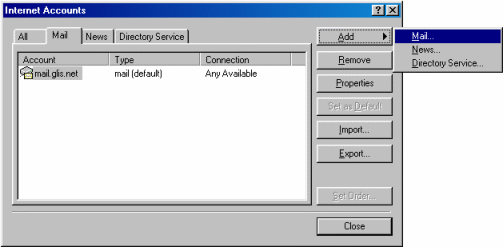
Click on Add / Mail...
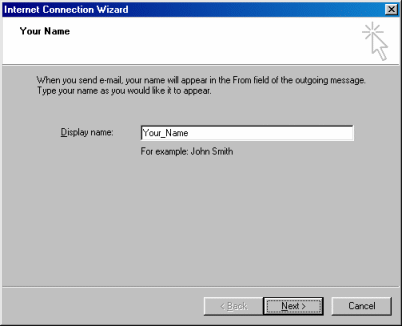
Display name:
Type in the name you want to appear when people recieve your e-mail.
Click the Next button.
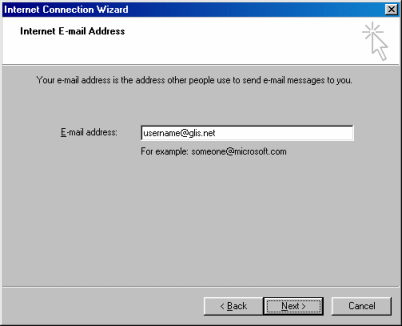
E-mail address:
Type in your e-mail address.
Click the Next button.
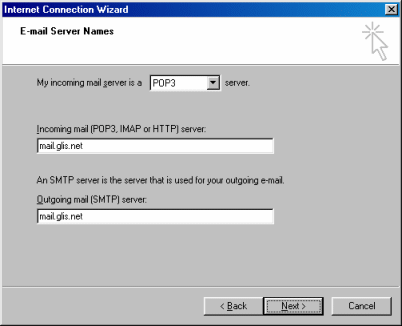
My incoming mail server is a POP3 server
Incoming mail (POP3, IMAP or HTTP) server:
Type in mail.glis.net or mail.c3net.net
Outgoing mail (SMTP) server:
Type in mail.glis.net or mail.c3net.net
Click the Next button.
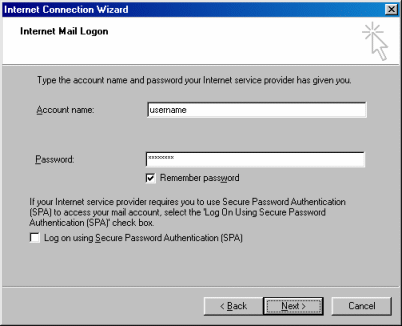
Account name:
Your username should already be in there.
Password:
Type your password in there.
Remember! Username and password are case-sensitive.
NOTE:
Our mail servers use a program called "Tar-Pitting".
If you CC or BCC an e-mail to 4 or more people at once, you'll want to
put a check-mark next to Log on using Secure Password Authentication (SPA)
When this option is selected, you'll be prompt for you password
the next time you send e-mail.
Click the Next button.

Click the Finish button.
Click the Close button at the Internet Accounts window.
Now that we got all that out of the way. Let's start creating message rules...
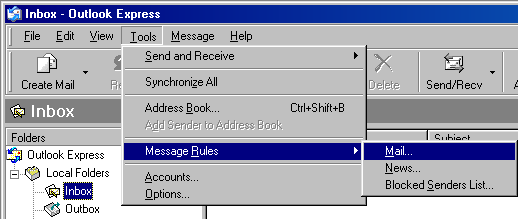
Click on Tools / Message Rules / Mail...
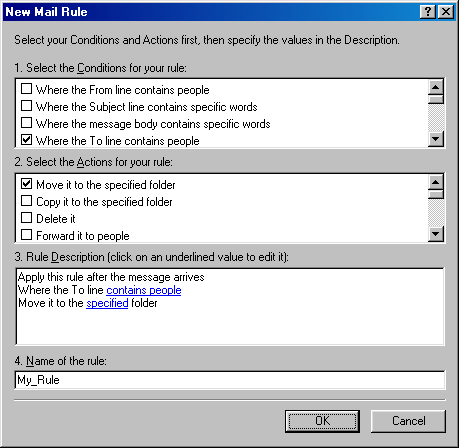
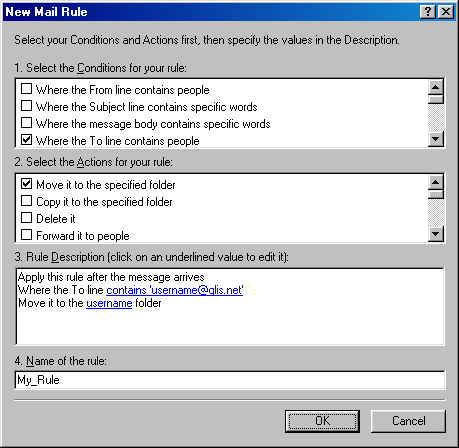
Check mark Where the To line contains people.
Check mark Move it to the specified folder.
Name of the rule:.
Type in a name for your message rule.
Click on the link that says contians people.
Window below will appear
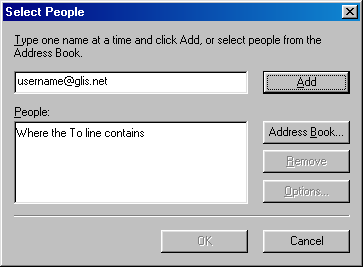
In the top field type in the e-mail address.
Click the Add button.
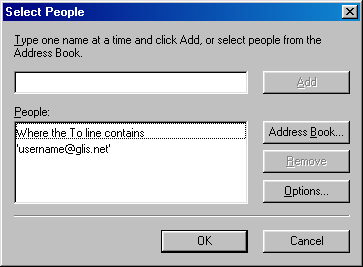
After clicking the Add button. Your e-mail address
will now be entered in the People: field.
Click the OK button.
Back at the "New Mail Rule" window.
Click on the link that says specified folder.
Window below will appear
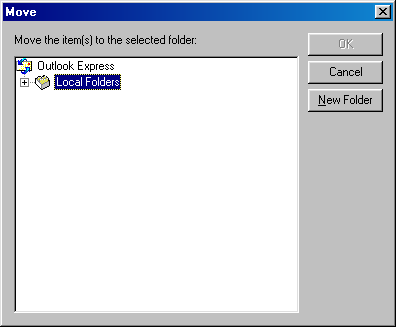
Select Local Folders and click the New Folder button.
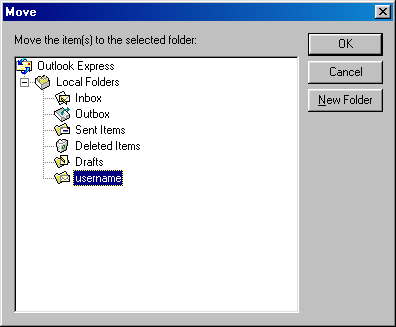
Window below will appear

Type in your username in the Folder Name: field.
Click the OK button.
Now you'll be back at the window.
Click the OK button.
And back at this window.
Click the OK button.
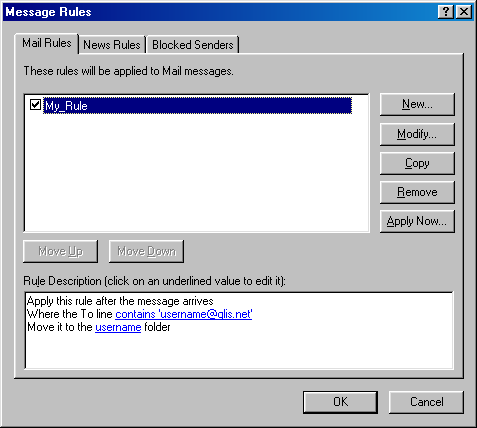
And again... Back at this window.
Click the OK button.
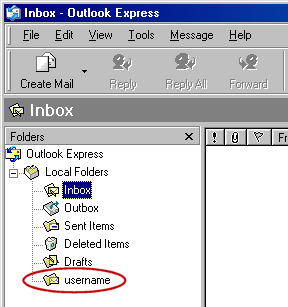
Now in the main part of Outlook Express, you'll see the
folder that you created. Whatever e-mail address you created
the message rule for the e-mails for that address will
be moved to that folder.
That's it!
Back to Outlook Express Contents
|
